Deployment Automation for Goerli testnet in 10 minutes
Hello world, happy new year to everyone. Hope you are having a great start to 2019.
Today, I’m going to share a short tutorial to quickly deploy the new Goerli Proof-of-Authority cross-client test network which was originally developed at [ETHBerlin](https://ethberlin.com) in September 2018 and then we, Afri (@5chdn) and ChainSafe (@chainsafeth), have been actively developing Goerli. As of now, Goerli is supported in Geth, Parity, Pantheon, Nethermind and EthereumJS.⌗
If you would like to follow the current development of Goerli, fork the Goerli testnet repo.⌗
Let’s get started. These steps will work on any UNIX system (Mac & Linux). First, go ahead and create a GCP (Google Cloud Platform) account here and then create a project. By default, Google gives $300 worth of free credits for a year.
Then, we need Terraform, it is an open source tool to easily create reusable and modular infrastructure deployment automation code.
To install it on Mac, you can use brew, if you don’t have brew, you can install it using this script. Once, you are done, then go ahead and install using the next command.
/usr/bin/ruby -e "$(curl -fsSL https://raw.githubusercontent.com/Homebrew/install/master/install)"

brew install terraform
If you are on any Linux, follow the quick walkthrough here to install Terraform. Terraform has some excellent documentation on how to get up and running quickly.
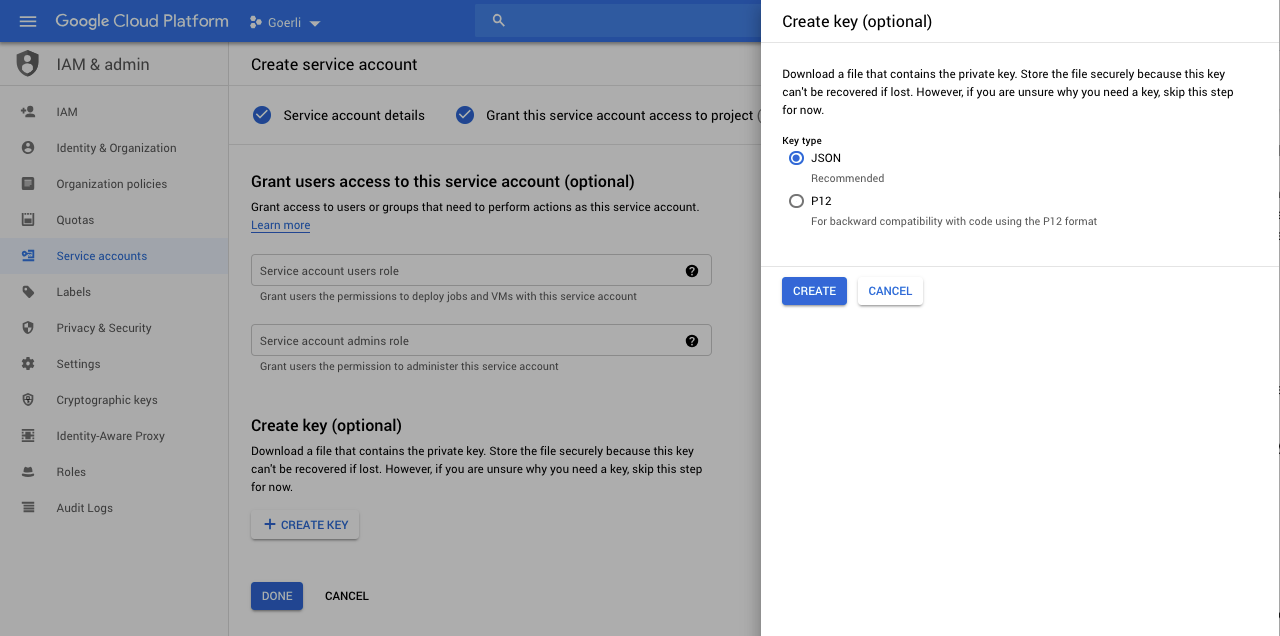
Next step, you have to create a service account key in GCP.
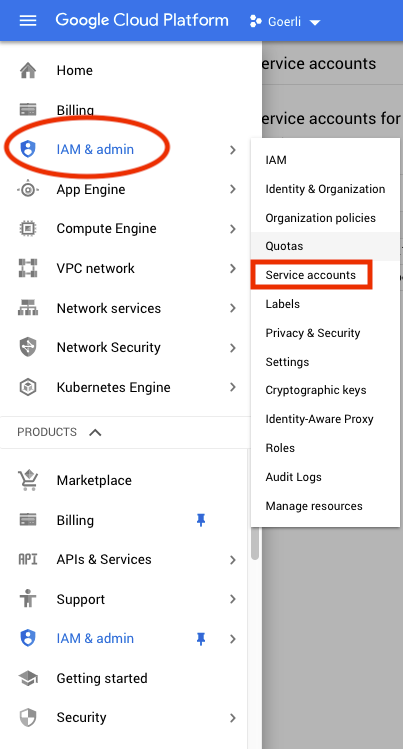
On the creation screen, give it a name and description. For the role access, make sure you give it Compute Engine Admin role. Next, create your key and download the JSON key. Make sure to securely store this file, this file is very very private and sensitive! And DO NOT EVER PUSH THIS FILE TO YOUR PUBLIC REPO!
Now that we have our necessary steps done, we will start writing our Terraform deployment script.
In your project directory, copy the JSON file which you just downloaded and then create a file called goerli.tf (you can name it whatever you want).
This is what your Terraform file will look like. In the first block, we define the provider which is google for us, inside that we define the location for the credentials.json and your project ID which you will find in your project settings.
Next, we define our virtual instance’s name, region, cpu, ram, hard disk, operating system, firewalls, and other necessary configs.
At the very bottom, we define our startup script where the list of commands will run after the virtual instance is created to do the basic housekeeping stuff like updating the OS, installing Node.js and Geth (the client which will be running Goerli at).
Now, in your terminal, run the command:
terraform apply
And, you should see your instance is being created in the GCP compute engine console.
Congratulations, you have successfully deployed your virtual machine on the cloud! 👏 👏 👏⌗
Next, we will SSH into our newly created VM. GCP provides few ways to connect to your remote machine rather than traditional methods; creating and managing your SSH keys like other cloud providers so, we will use the gcloud utils. You need to have gcloud installed on your computer so, go ahead and follow the instructions here.

Once, you SSH’d into your VM, go ahead and clone the Goerli testnet repo from Github into your home directory and then we will run a few commands.
geth init ./testnet/geth/goerli.genesis
This is to initialize Goerli’s Genesis block.
We are almost done, next, we will copy the boot nodes (the IP addresses of the peer nodes) to the geth data directory.
cp testnet/geth/static-nodes.json .ethereum
Now, we will boot up our Goerli node
nohup geth --networkid 6284 &
This will continue to run in the background. 6284 is the network ID of Goerli so when running Geth we need to specify as the — goerli hasn’t been merged to Geth master yet. Here is the link to the PR.
You will see a file called nohup.out, where it stores the log. Now, if you do:
tail -f nohup.out
You should see the terminal output of Geth running the Goerli network.
Congrats, we are done here, you are successfully one of the peers in the Goerli network! 🎉🎉🎉⌗
You can use the same Terraform file by just tweaking a little bit to automate your deployment to any cloud provider like AWS, Azure, AliCloud, DigitalOcean, or even Heroku. You can also customize the current configuration to play with it.
Here is a list of a few useful resources:
Official Go implementation of the Ethereum protocol - ethereum/go-ethereum
Provider: Google Cloud Platform - Terraform by HashiCorp
The Google provider is used to configure your Google Cloud Platform infrastructure
Concepts | Compute Engine | Google Cloud
Google Cloud delivers secure, open, intelligent, and transformative tools to help enterprises modernize for today’s digital world.